
Sarah stared at her kitchen counter on a dreary February morning, watching steam rise from her coffee cup as rain drummed against the window. Her weekend stretched ahead, empty and grey. Then she remembered the bag of flour tucked away in her pantry—a relic from ambitious pandemic baking plans that never quite materialized.
Three hours later, her entire apartment smelled like a French bakery. Golden brioche sat cooling on a wire rack, its buttery aroma filling every corner. Her neighbor knocked, asking what smelled so incredible. That’s when Sarah realized she’d stumbled onto something special: homemade bread baking had transformed not just her kitchen, but her entire winter mood.
You don’t need to be a professional baker to create this magic in your own home. With the right tools and a bit of patience, your kitchen can become that cozy neighborhood bakery you’ve always dreamed of visiting on cold mornings.
Why Winter Makes Homemade Bread Baking Irresistible
Winter creates the perfect storm for bread making. Those short, dark days that usually leave us feeling sluggish? They’re actually ideal for long, slow fermentation that develops incredible flavor in homemade bread.
Cold temperatures naturally regulate yeast activity, preventing dough from rising too quickly and developing that complex, tangy taste that makes artisan loaves so addictive. Your heated home becomes a controlled environment where dough can rise slowly and steadily.
“The beauty of winter baking is that your house does half the work,” explains master baker Elena Rodriguez, who runs a small bakery in Vermont. “Consistent indoor temperatures mean consistent results, even for beginners.”
There’s something deeply satisfying about kneading dough while snow falls outside. The rhythmic motion warms your hands, the anticipation builds as aromas fill your home, and suddenly those long winter evenings have purpose and structure.
Essential Tools That Transform Your Kitchen Into a Bakery
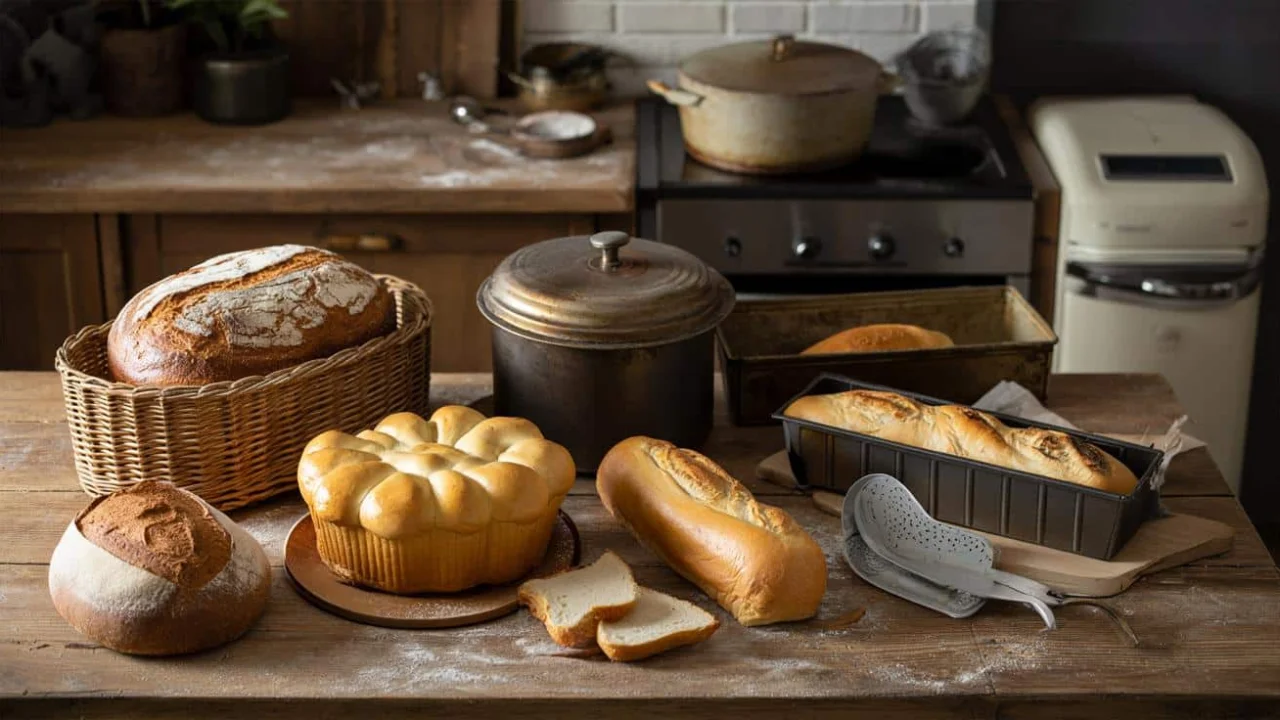
You don’t need a commercial kitchen to create professional-quality bread and brioche. These carefully chosen tools make the difference between frustrating failures and consistent, bakery-worthy results.
| Tool | Purpose | Price Range | Must-Have Level |
|---|---|---|---|
| Oval Banneton | Shapes and supports rising dough | $15-30 | Essential |
| Fluted Brioche Tin | Creates perfect brioche shape | $20-45 | Essential |
| Kitchen Scale | Accurate ingredient measurements | $25-50 | Critical |
| Bench Scraper | Handles sticky dough easily | $8-15 | Very Helpful |
| Dutch Oven | Creates steam for crusty bread | $40-120 | Game-changer |
The Banneton: Your Dough’s Best Friend
An oval banneton looks like a simple wicker basket, but it’s actually precision engineering disguised as rustic charm. This proofing basket does three critical jobs that elevate homemade bread from amateur to artisan.
- Supports soft, high-hydration doughs during final rise
- Controls shape so loaves don’t spread flat
- Creates those beautiful flour rings that scream “professional bakery”
- Develops surface tension for better oven spring
“A banneton is like training wheels for bread shaping,” says James Chen, a sourdough specialist from San Francisco. “It gives beginners the confidence to work with wetter doughs that create better texture.”
Fluted Brioche Tins: Engineering Butter Into Beauty
Brioche dough is essentially edible engineering—butter, eggs, and flour held together by technique and the right container. Traditional fluted brioche tins aren’t just pretty; their ridged design serves specific purposes.
The vertical ridges guide rich dough upward rather than outward, creating that iconic dome shape. Heavy metal construction ensures even heat distribution, preventing the soggy centers that plague free-form brioche attempts.
- Individual 4-inch tins for personal brioches
- Large 9-inch tins for family-sized loaves
- Non-stick options for easy release
- Traditional carbon steel for superior browning
How These Tools Change Your Homemade Bread Baking Game
The difference between having the right tools and making do with whatever’s in your kitchen is like comparing a professional photographer’s camera to a phone snapshot. Both might capture the moment, but one creates art.
Take temperature control. Professional bakers obsess over dough temperature because it affects everything from rise time to final texture. A simple kitchen thermometer transforms guesswork into precision, letting you adjust water temperature to hit that sweet spot of 75-78°F for optimal yeast activity.
Measuring ingredients by weight rather than volume eliminates the biggest variable in home baking. Flour can vary dramatically in density depending on humidity, how it’s stored, and even the brand. A cup of flour might weigh anywhere from 120 to 150 grams—that’s a 25% difference that can make or break your bread.
“Consistency is what separates good home bakers from great ones,” notes pastry chef Maria Santos, who teaches weekend baking classes. “The right tools don’t just make baking easier—they make it repeatable.”
Creating the Perfect Baking Environment
Your oven probably wasn’t designed for artisan bread, but a few tricks can transform it into a steam-injected wonder machine. Professional bread ovens inject steam during the first few minutes of baking, keeping the crust flexible so loaves can expand fully.
A Dutch oven mimics this effect beautifully. Preheat the pot, drop in your shaped dough, cover it, and let trapped moisture create that essential steam. Remove the lid halfway through baking for the final browning phase.
- Place a pan of boiling water on the bottom oven rack
- Spritz the oven walls with water just before loading bread
- Use a Dutch oven for hands-off steam injection
- Bake on a pizza stone for consistent bottom heat
The Real Impact on Your Daily Life
Once you start baking bread regularly, something shifts in your relationship with food and time. Suddenly you’re thinking ahead—mixing dough after dinner for tomorrow’s breakfast, planning weekend baking sessions like small celebrations.
The financial impact adds up quietly but significantly. A loaf of decent artisan bread costs $4-6 at the store. The same loaf costs perhaps $1 in ingredients to make at home, and tastes infinitely better because it’s fresh and made exactly to your preferences.
More importantly, homemade bread baking creates what psychologists call “productive mindfulness”—activities that quiet mental chatter while creating something tangible and valuable. The repetitive motions of kneading, the focused attention required for timing, the sensory rewards of smell and texture all combine into a natural stress-relief system.
“My therapy sessions dropped from weekly to monthly once I started baking bread every Saturday,” shares home baker Tom Williams from Portland. “There’s something about creating food with your hands that puts everything else in perspective.”
FAQs
Do I really need special tools for homemade bread baking?
While you can make bread with basic equipment, proper tools dramatically improve consistency and reduce frustration, especially for beginners.
How much space do I need for bread baking?
Even a tiny kitchen works perfectly—you just need counter space for kneading and somewhere warm for rising, like near a radiator or on top of the fridge.
Is homemade brioche really that much better than store-bought?
Absolutely—fresh brioche has a pillowy texture and buttery richness that industrial versions can’t match, plus you control every ingredient.
How long does homemade bread stay fresh?
Properly stored homemade bread stays delicious for 3-4 days at room temperature, or can be sliced and frozen for up to three months.
What’s the biggest mistake new bread bakers make?
Using measuring cups instead of a kitchen scale—weight measurements are far more accurate and lead to consistent results every time.
Can I make bread if I’m not home all day?
Yes—many bread recipes can be adapted for slow, cold rises in the refrigerator, letting you work around any schedule.