
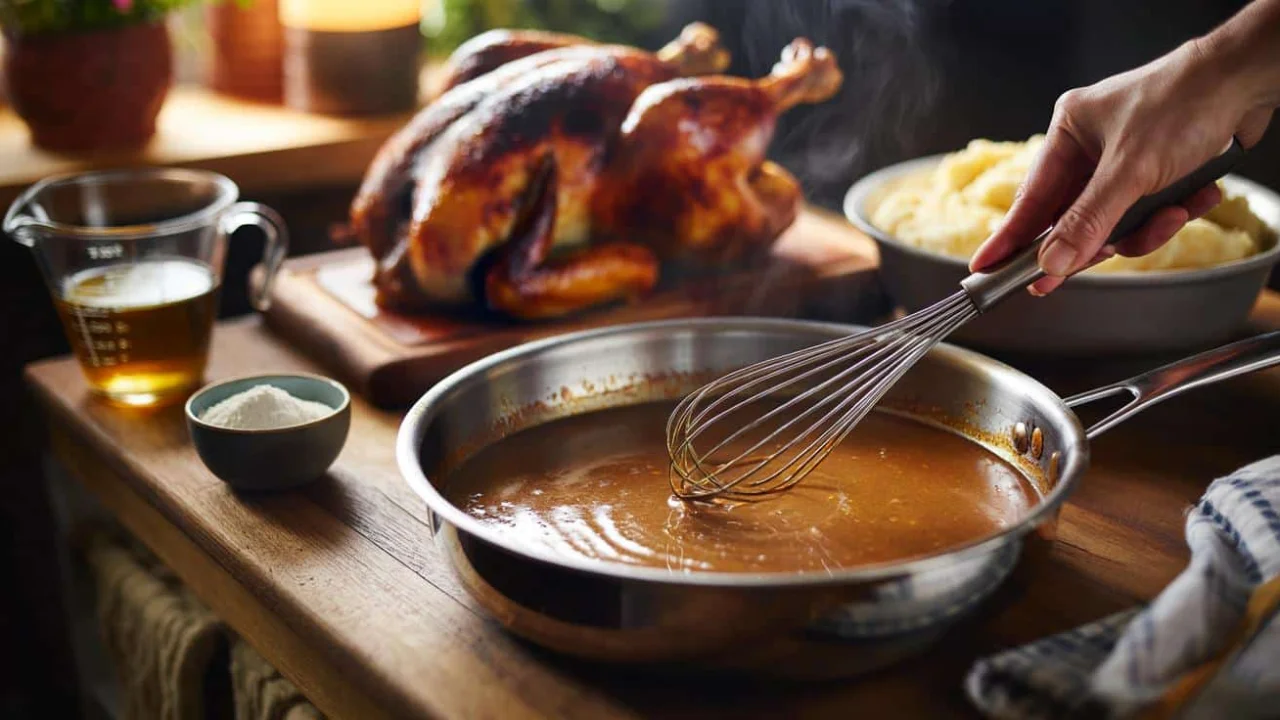
Last Thursday, I stared at the most beautiful disaster in my kitchen. The roasting pan sat there like a crime scene—crusty brown bits welded to the bottom, a slick of golden fat pooling in the corners, and me holding a wooden spoon like I was about to perform surgery. My family was already seated, forks ready, while I contemplated whether to scrape this mess into the trash or attempt something I’d failed at countless times before.
But those pan drippings looked too rich, too promising to waste. So I took a deep breath, sprinkled in some flour, and started stirring. What happened next surprised everyone at the table—especially me. In five minutes, I had the smoothest, most flavorful homemade gravy I’d ever made.
That moment changed how I think about cooking. Sometimes the best things come from what looks like a complete mess.
Why pan drippings create liquid gold
Every time you roast meat, you’re creating a concentrated flavor bomb without even trying. Those brown, caramelized bits stuck to your pan aren’t kitchen failures—they’re the foundation of restaurant-quality gravy.
- When someone walks ahead of you, psychology reveals what they’re really thinking about your relationship
- Engineers secretly pump water into abandoned oil wells to stop massive cities from sinking underground
- One Bay Leaf Anti Aging Trick Your Grandmother Never Told You About Changes Everything In Days
- This Nighttime Ritual Tricks Your Brain Into Better Sleep Quality (Without Any Pills)
- This simple baked meal forced me to put my phone down and actually taste my food
- Mars time dilation is quietly breaking our space clocks, and mission planners are scrambling to adapt
Pan drippings contain three magic ingredients: rendered fat, meat juices, and fond (those crispy bits). The fat becomes your cooking medium, the juices add deep flavor, and the fond dissolves into pure umami when you add liquid.
“The biggest mistake people make is throwing away those drippings,” says chef Maria Rodriguez, who’s taught thousands of home cooks. “That’s where all your flavor lives. You literally roasted it into existence.”
Making smooth homemade gravy isn’t about following a complicated recipe—it’s about understanding what flour and fat do when they meet heat. The process builds on itself, each step making the next one easier.
The step-by-step breakdown that actually works
Here’s exactly what happens when you turn pan drippings into smooth gravy, and why each step matters:
| Step | What You Do | Why It Works | Time Needed |
|---|---|---|---|
| 1 | Heat drippings in pan | Melts fat, loosens fond | 1-2 minutes |
| 2 | Whisk in flour | Fat coats flour particles | 30 seconds |
| 3 | Cook the roux | Eliminates raw flour taste | 1-2 minutes |
| 4 | Add liquid slowly | Prevents lumps forming | 2-3 minutes |
| 5 | Simmer and adjust | Thickens to perfect consistency | 2-3 minutes |
The key ratios that never fail:
- 2 tablespoons fat to 2 tablespoons flour (makes about 1 cup gravy)
- 1 cup warm liquid per 2 tablespoons of roux
- Salt to taste—start with 1/2 teaspoon
- Fresh cracked pepper enhances the meat flavors
“Temperature is everything,” explains culinary instructor James Chen. “Hot fat, room temperature flour, warm stock. Cold liquid hitting hot roux is where most people create lumps they can’t whisk out.”
The liquid you choose transforms the final flavor. Chicken stock creates classic poultry gravy. Beef stock makes rich, dark gravy perfect for red meat. Even vegetable stock works if you want lighter flavor.
When homemade gravy becomes your secret weapon
Once you nail this technique, everything changes at your dinner table. Suddenly, leftover mashed potatoes become worth fighting over. Plain roasted vegetables taste like they came from an expensive restaurant. Even simple pasta becomes comfort food gold when you toss it with homemade gravy.
This skill pays off during holidays when everyone expects perfect gravy but nobody wants to make it. While others stress about lumpy sauce or bland flavor, you’re calmly whisking liquid gold from the same pan that cooked the turkey.
Restaurant chef Sarah Kim puts it simply: “Home cooks think gravy is complicated because they’ve never seen how simple it really is. Fat plus flour plus liquid equals success. Everything else is just technique.”
The best part? This method works with any roasted meat. Chicken drippings make golden gravy with herbs. Pork drippings create rich, savory sauce perfect for biscuits. Even beef drippings transform into steakhouse-quality gravy in minutes.
Troubleshooting the most common mistakes
Even experienced cooks stumble with gravy sometimes. Here’s how to fix the problems before they ruin dinner:
- Lumpy gravy: Strain through fine mesh sieve or use immersion blender
- Too thin: Mix equal parts flour and cold water, whisk into simmering gravy
- Too thick: Add warm stock tablespoon by tablespoon until smooth
- Too salty: Add splash of cream or butter to balance flavor
- Lacks flavor: Scrape up more fond or add splash of wine
The science behind smooth gravy is surprisingly forgiving. Even if your roux looks patchy or your first pour of liquid creates lumps, keep whisking and adding liquid gradually. Heat and motion solve most texture problems.
“I tell my students that gravy wants to be smooth,” notes cooking instructor David Park. “Your job is just to not panic and keep stirring. The flour and fat will figure it out if you give them time.”
Professional kitchens rely on this same basic technique, just scaled up. The fundamentals don’t change whether you’re making one cup or one gallon. Master this method once, and you’ll never buy jarred gravy again.
FAQs
Can I make gravy if my pan drippings look burned?
Yes, as long as they’re dark brown, not black. Strain the drippings and taste—if they’re bitter, start over with butter and flour instead.
What if I don’t have enough drippings for gravy?
Add butter to reach the right fat amount, or use a combination of drippings and butter for the base.
How do I store leftover homemade gravy?
Refrigerate for up to 3 days or freeze for 3 months. Reheat slowly, whisking in liquid if it gets too thick.
Can I make gravy ahead of time?
Absolutely. Make it earlier in the day and reheat gently, adding warm stock if needed to restore consistency.
What’s the best flour for smooth gravy?
All-purpose flour works perfectly. Avoid self-rising flour, which contains leavening agents that create weird textures.
Why does my gravy taste floury even after cooking?
Cook the flour and fat mixture longer before adding liquid—at least 1-2 minutes to eliminate the raw flour taste.