
Last Tuesday night, I stood in my kitchen watching snow pile up against the window while my stomach growled with that particular 6 PM hunger. The thought of venturing out for groceries felt absurd – the kind of cold that makes your face hurt just thinking about it. But then I remembered the block of raclette cheese sitting in my fridge, a leftover from last weekend’s dinner party.
That’s when I discovered what might be the perfect antidote to miserable winter evenings: a skillet raclette toastie that takes just four ingredients and fifteen minutes to transform your kitchen into a cozy Alpine refuge.
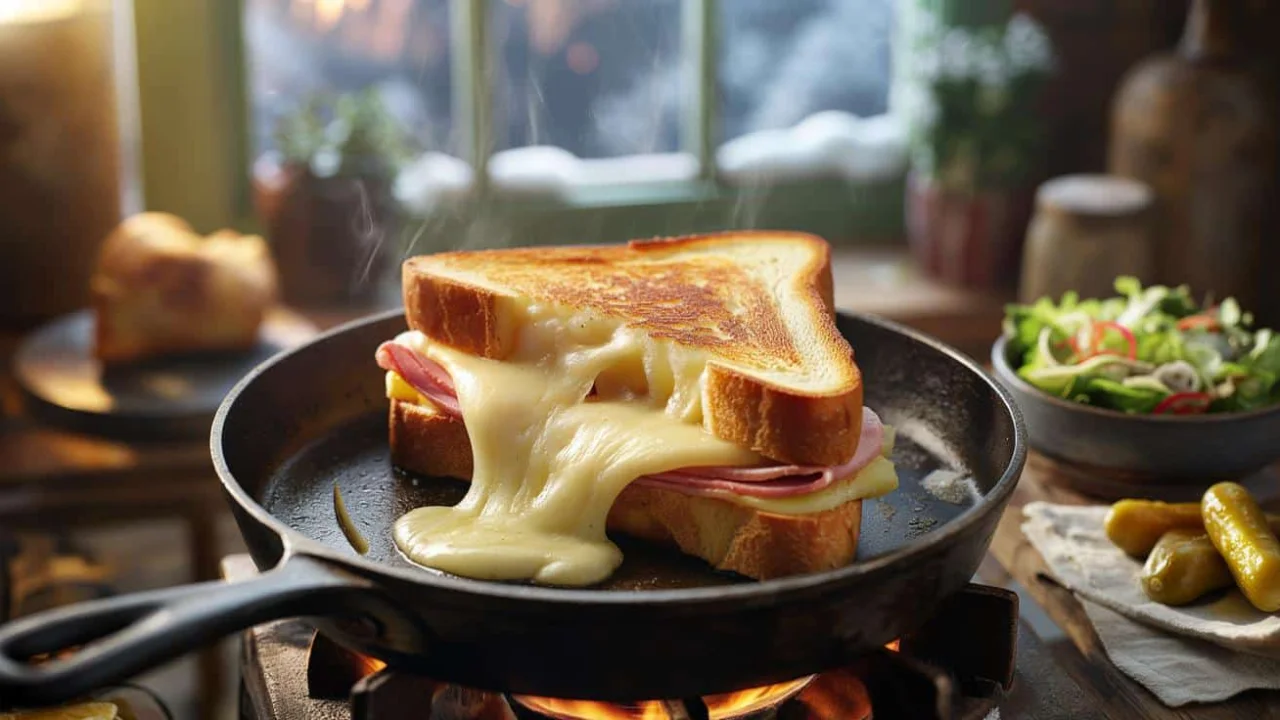
Sometimes the best comfort food isn’t complicated. It’s that moment when melted cheese starts bubbling at the edges of golden bread, filling your kitchen with the kind of aroma that makes you forget there’s a world outside.
Why Your Regular Grilled Cheese Can’t Compare
Traditional raclette involves an entire production – tabletop grills, mountains of potatoes, cured meats, pickles, and enough setup to feed a small village. It’s wonderful for special occasions, but completely impractical when you just want something warm and satisfying on a random Wednesday.
This skillet raclette toastie captures all that Alpine comfort without any of the fuss. Think of it as raclette’s casual younger sibling – less formal, but just as satisfying.
“The beauty of raclette cheese is how it melts,” explains chef Marie Dubois, who runs a French bistro in Vermont. “It becomes creamy and stretchy without ever turning greasy, which makes it perfect for this kind of simple preparation.”
The key difference between this and your typical grilled cheese lies in the cheese itself. Raclette has a distinctive nutty, slightly funky flavor that’s been perfected over centuries of Alpine cheesemaking. When it melts, it creates long, satisfying strings that make every bite feel indulgent.
Your Shopping List: Four Ingredients That Pack Maximum Flavor
The magic of this recipe lies in its simplicity. You need exactly four main ingredients, plus butter for cooking. Quality matters here more than quantity.
| Ingredient | Amount (serves 2) | Why It Matters |
|---|---|---|
| Thick-cut bread | 4 slices | Holds the filling without getting soggy |
| Raclette cheese | 4-6 slices | Creates that signature stretchy melt |
| Cooked ham | 2-3 slices | Adds savory depth and protein |
| Mustard | 1 tablespoon | Cuts through richness with acidic bite |
| Salted butter | 2 tablespoons | Creates golden, crispy exterior |
For the bread, skip anything too delicate. You want something substantial – a good sourdough, country loaf, or even thick-cut sandwich bread works perfectly. The slices should be about half an inch thick.
If you can only find raclette in a wheel or block, slice it yourself. Aim for slices roughly the thickness of American cheese, maybe slightly thicker. The goal is enough cheese to create proper ooze factor without overwhelming the bread.
The 15-Minute Method That Changes Everything
Here’s where this recipe gets brilliant in its simplicity. No special equipment, no complicated timing – just a regular skillet and some basic technique.
Start by spreading a thin layer of mustard on one side of each bread slice. Don’t skip this step – the mustard’s acidity is what prevents the toastie from feeling too heavy.
- Layer the raclette cheese generously on two slices
- Add the ham over the cheese
- Top with remaining bread slices, mustard-side down
- Press gently to help everything stick together
Heat your skillet over medium-low heat. This isn’t a race – you want the cheese to melt completely before the bread burns.
“The secret is patience,” says cookbook author James Mitchell, who specializes in comfort food. “Low and slow gives you that perfect golden crust while ensuring the cheese melts all the way through.”
Butter the outside of your assembled sandwiches generously. Place them in the warm skillet and resist the urge to press down with a spatula. Let gravity and gentle heat do the work.
After about 4-5 minutes, you’ll see the edges starting to turn golden. Flip carefully – the melted cheese might try to escape, but that’s part of the charm. Cook another 3-4 minutes until both sides are crispy and the cheese is fully melted.
What Makes This Winter’s Perfect Comfort Food
There’s something deeply satisfying about food that requires minimal effort but delivers maximum comfort. This skillet raclette toastie hits that sweet spot perfectly.
The combination of crispy, buttery bread and molten cheese creates textural contrast that keeps each bite interesting. The ham adds just enough saltiness to balance the rich cheese, while the mustard provides a subtle tang that prevents flavor fatigue.
“It’s comfort food that doesn’t leave you feeling sluggish,” notes nutritionist Dr. Sarah Chen. “The protein from the ham and cheese, combined with good bread, creates a satisfying meal that actually sustains you.”
Unlike heavier comfort foods, this toastie feels indulgent without being overwhelming. It’s substantial enough for dinner but won’t leave you reaching for antacids later.
The best part? The whole process becomes a small ritual. The sizzling sounds, the cheese bubbling at the edges, the moment when you cut into the finished toastie and watch the cheese stretch – it’s almost meditative.
Making It Your Own
While the basic formula is perfect as-is, small variations can keep things interesting throughout the winter months.
- Try different mustard varieties – whole grain adds texture, honey mustard brings sweetness
- Swap ham for prosciutto, turkey, or even crispy bacon
- Add thin slices of apple or pear for a touch of sweetness
- Experiment with different raclette varieties – smoked raclette adds depth
Some people like to add pickles or caramelized onions, but honestly, the original version is pretty perfect. Sometimes the best recipes are the ones that don’t need improvement.
FAQs
Can I use regular Swiss cheese instead of raclette?
You can, but raclette has a unique melting quality and flavor that makes this recipe special. Gruyere is a better substitute if you can’t find raclette.
What if I don’t have a cast iron skillet?
Any heavy-bottomed pan works fine. Non-stick is actually easier for flipping, though you won’t get quite the same crispy exterior.
How do I know when the cheese is fully melted?
Gently press the center of the toastie – it should feel soft and give slightly. You might also see cheese starting to ooze at the edges.
Can I make these ahead of time?
They’re best eaten immediately, but you can assemble them earlier in the day and cook when ready. Just don’t butter the outside until you’re ready to cook.
What should I serve alongside this?
A simple green salad with vinaigrette cuts through the richness perfectly. A glass of crisp white wine doesn’t hurt either.
Why does my bread burn before the cheese melts?
Your heat is too high. Keep it at medium-low and be patient – the gentle heat will melt the cheese without burning the bread.